So ladies and gentlemen, boys and girls, come join me and follow along with my next month of guitar learning. Thats a total of 2 months. Probably close to 3 months. Wow… Just wow! Let me show you what I’ve learnt and how you too can learn the guitar like the genius talent that I am. Yep. GENIUS. Thats what i am. Yes indeed. Indoubatably. I’ll cover some new chords, scales and some more complex rhythm and strumming patterns.
You can follow along with my previous blog posts for my first month of guitar below.
- Learning Guitar Week 1 & 2: The Before Time and the Battle for Strumming and Rhythm
- Learning Guitar Week 3 & 4: More Complex Strumming + Chords
Chords
Well. Lets put things together in something resembling order. Here are the chords I’ve learnt so far in this month.
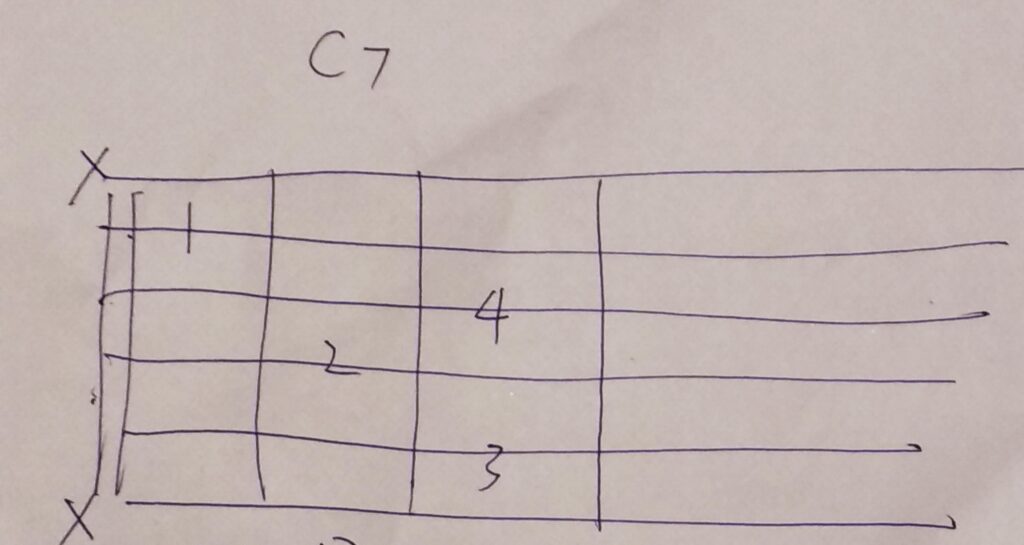
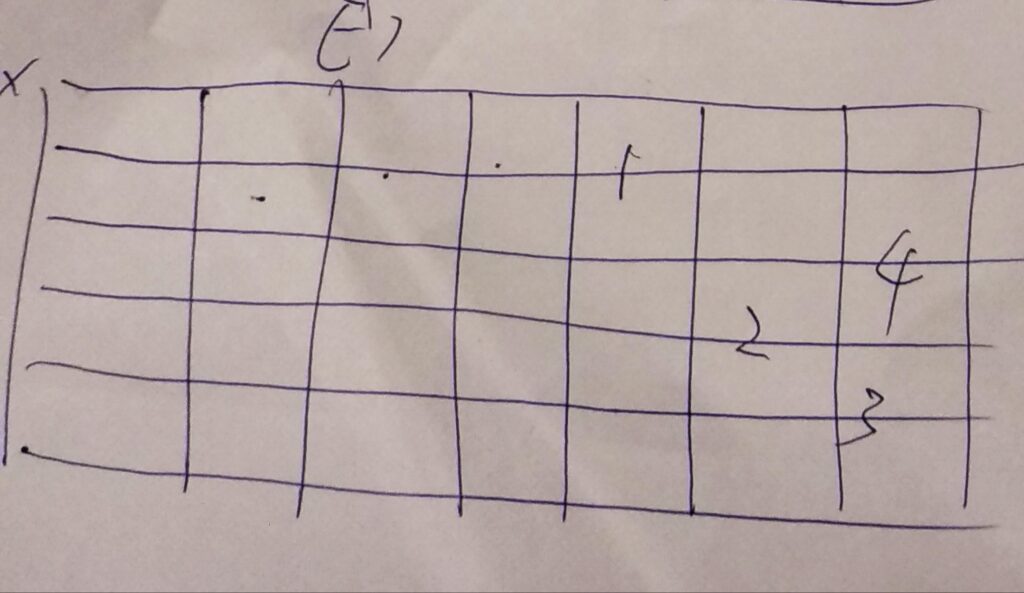
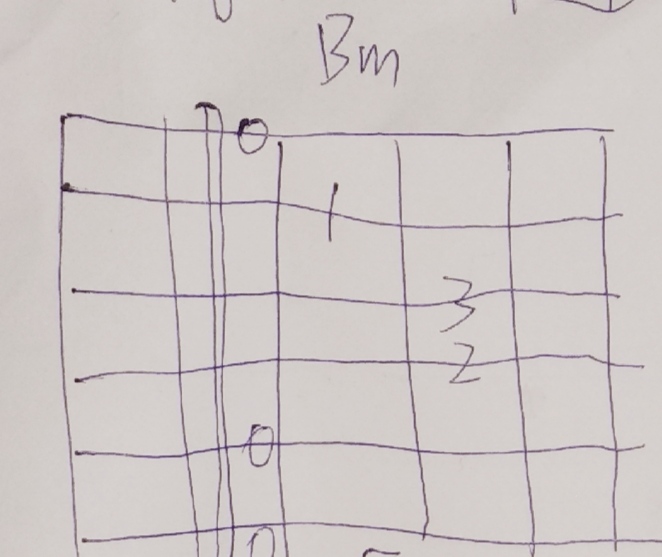
At the moment, we have mostly been using the E7 chord along with strumming. At some point in the future, I’ll come back to more of these chords and chord transitions. For now that’s it for this section.
Scales
Something new thats been added to the repetiore is scales. So now I can practice my singing at the same time. Have a look at the scale below. Here if you end up on any given string of the guitar you can move up along the string by moving either two frets over or one fret over.
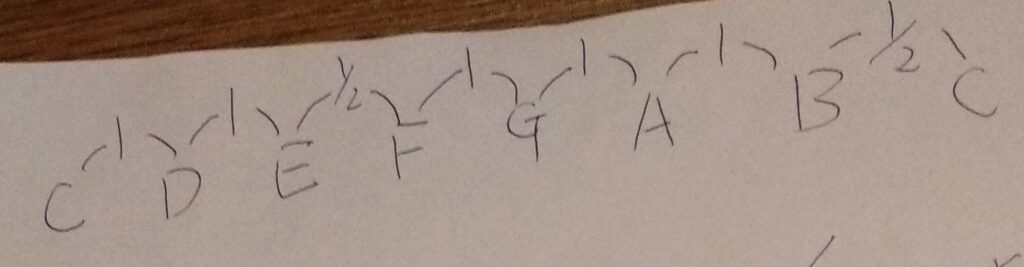
Moving two frets, for instance, takes you from C to D, from D to E, from F to G, G to A or from A to B. While moving one fret over takes you from E to F or B to C.
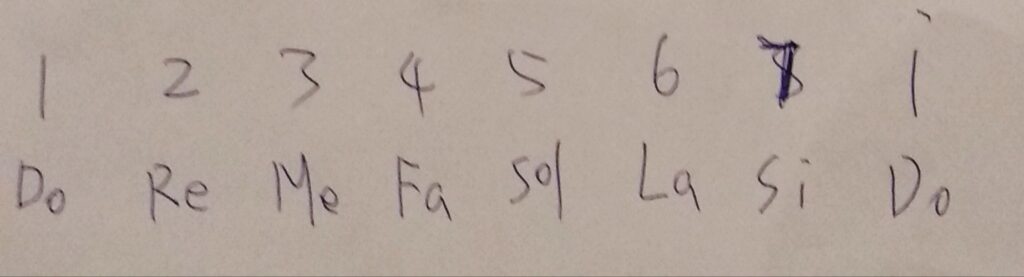
We can also convert these scales into our classic singing scale of Do, Re, Mi, etc. See below. I’ve also included the guitar scales for some of these as Lao Liu sang and played them. Check out the audio below as well. The audio goes from Do Re Mi Fa Sol to Fa Mi Re Do.
The below diagram shows the relationship between the vocal scale and the guitar equivalent. Note that the numbers on the extreme left indicate open string notes.
The numbers can be correlated to notes and keys as well as to the singing scale as shown below.
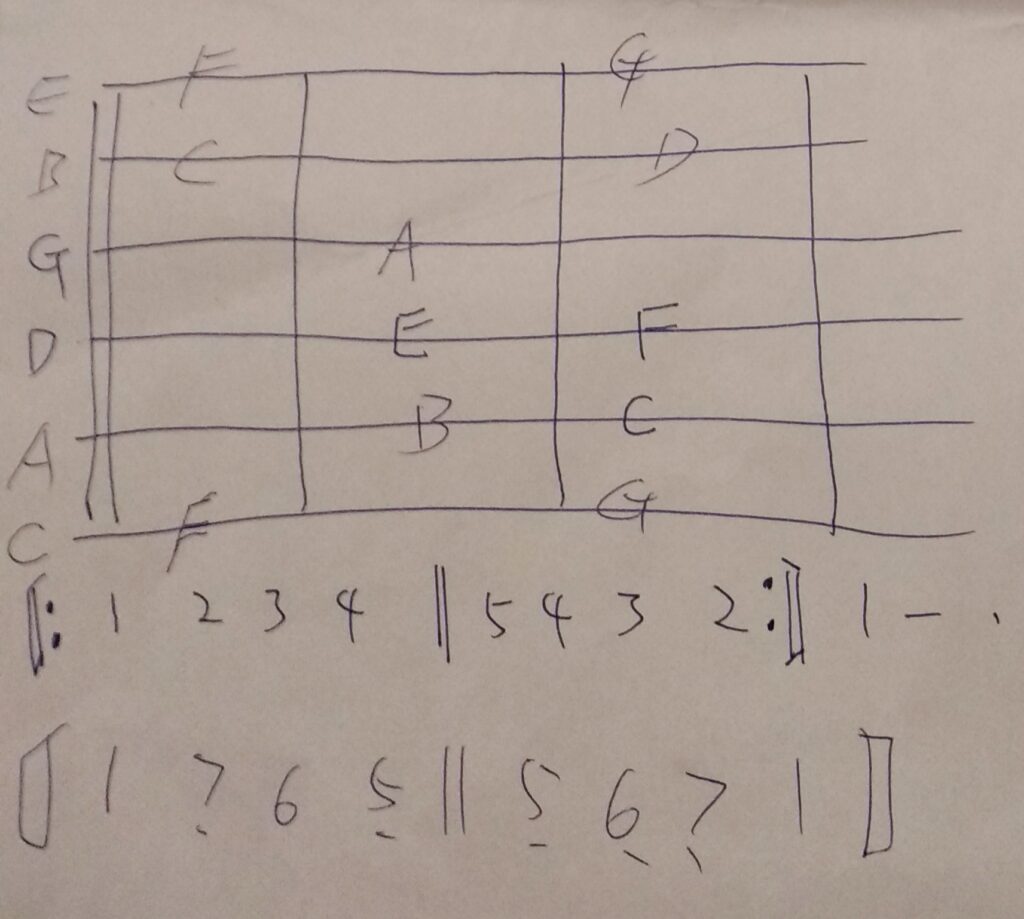
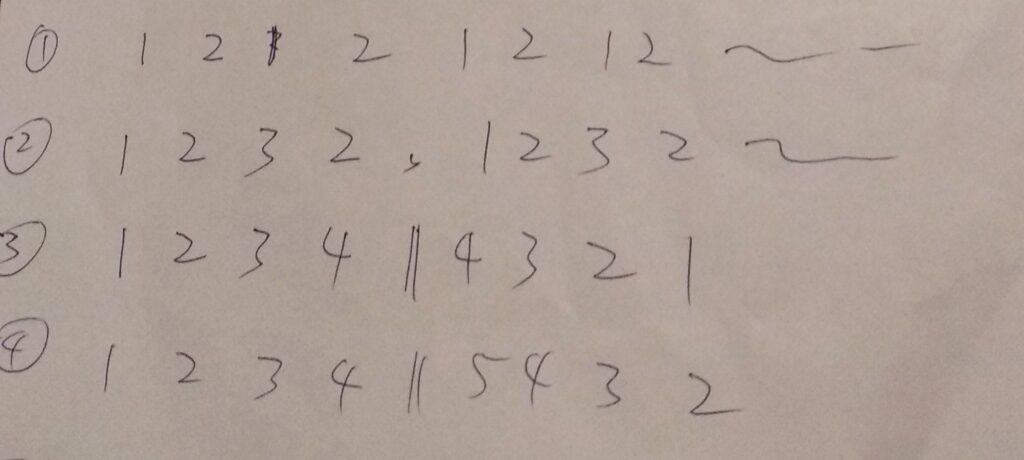
Here are some practice patterns for transitioning between each individual note on the scale.
And here is a complete song. This is a super famous one that even I knew. Unfortunately for the life of me I can’t remember what its called. Soooo. Good luck. If I play it and record it I’ll stick the recording into this blog below.
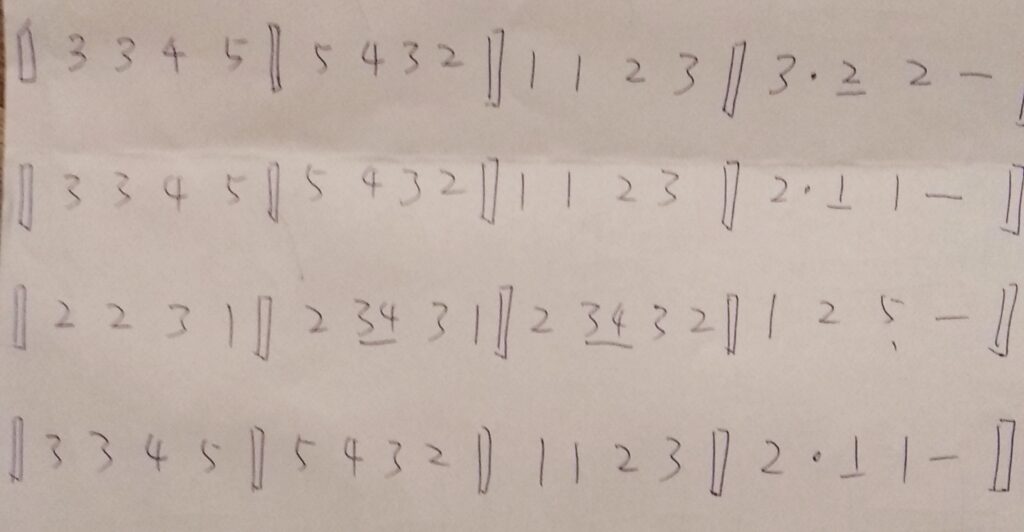
For this melody, where a 5 occurs we want to go to a lower pitch note rather than a higher pitch one. We can play this melody at higher pitch and lower pitch as well. I’ll add the audio below once I record it.
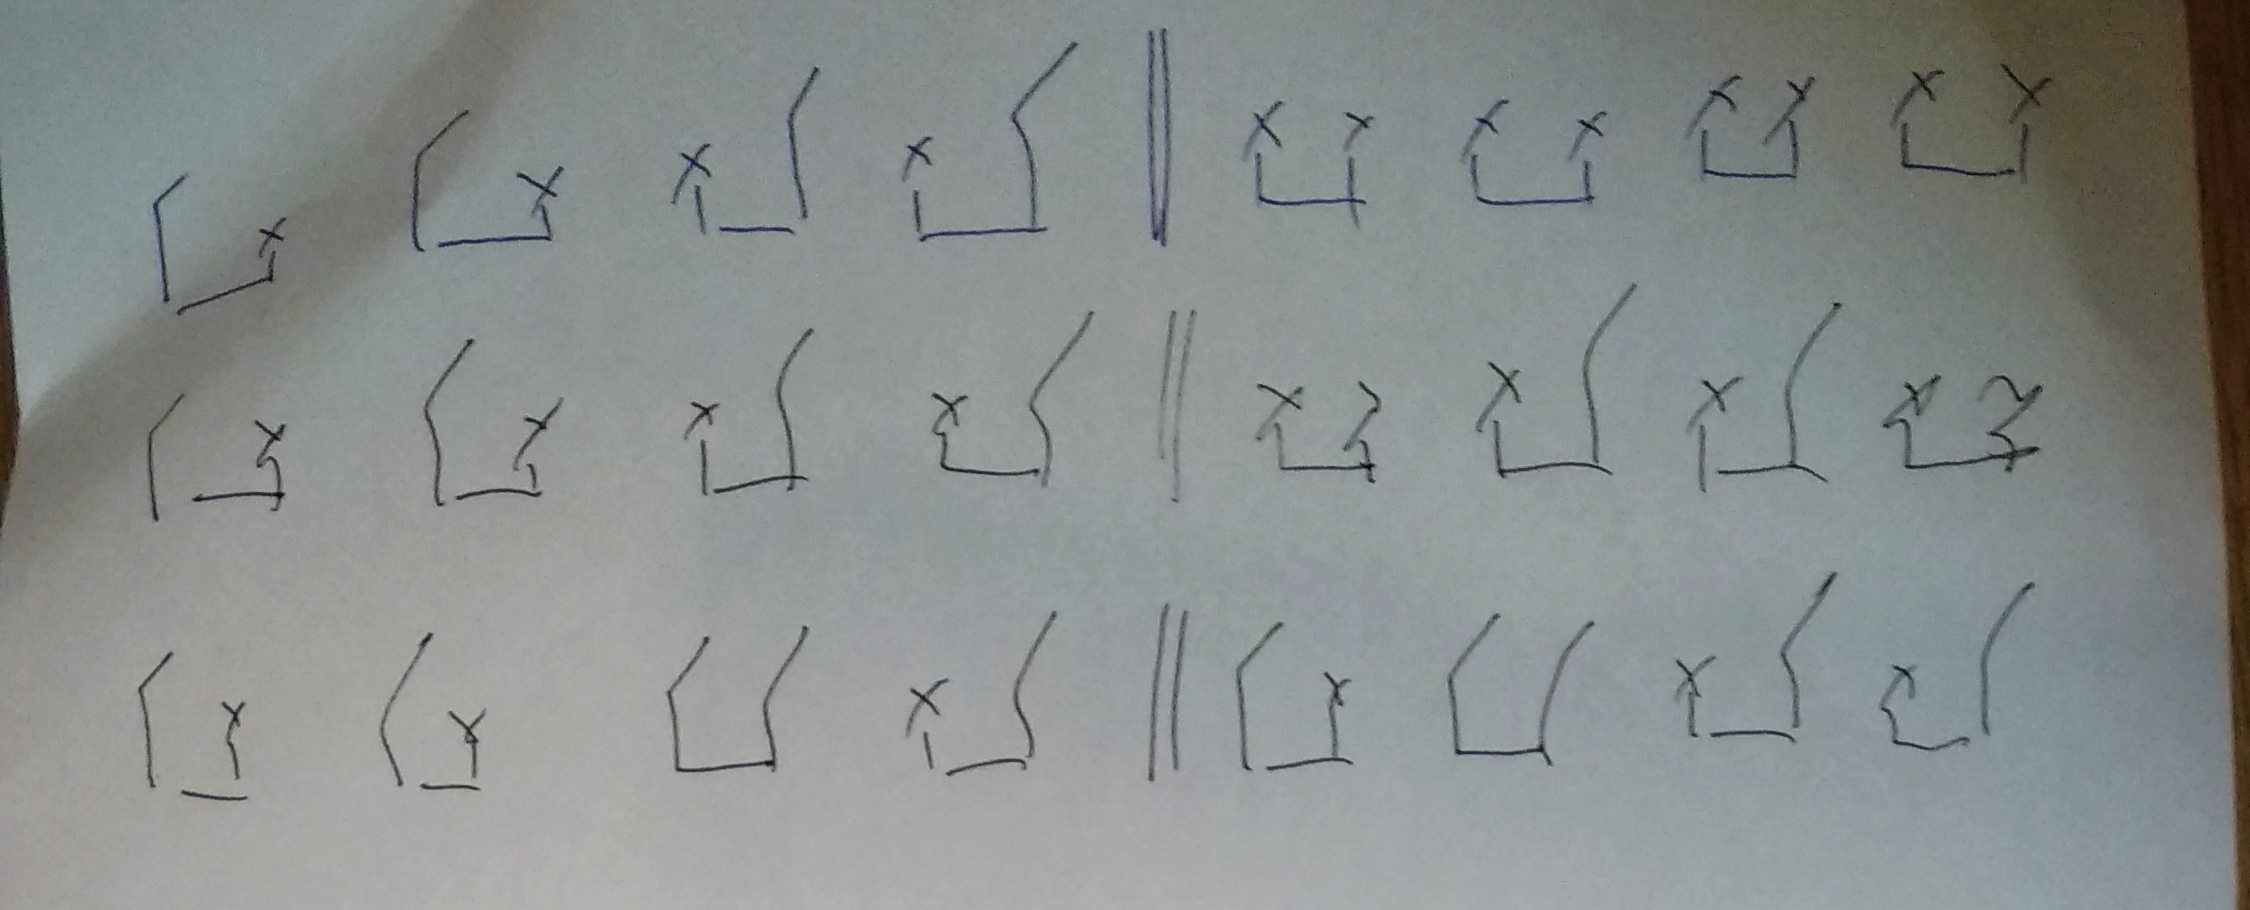
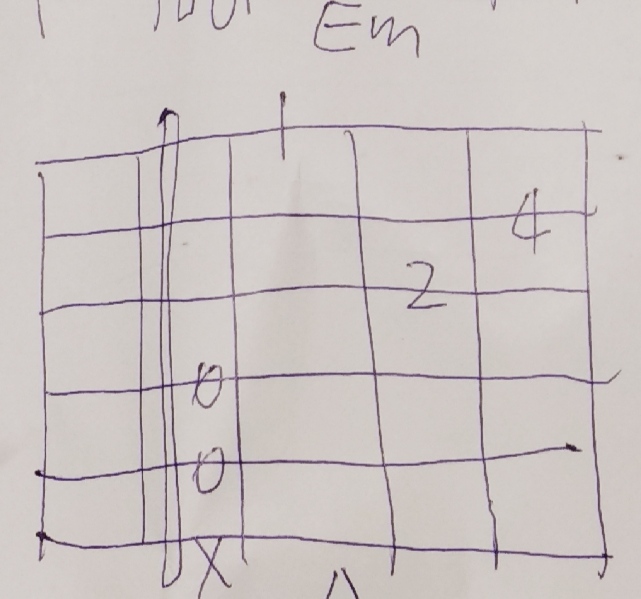
Strumming Patterns
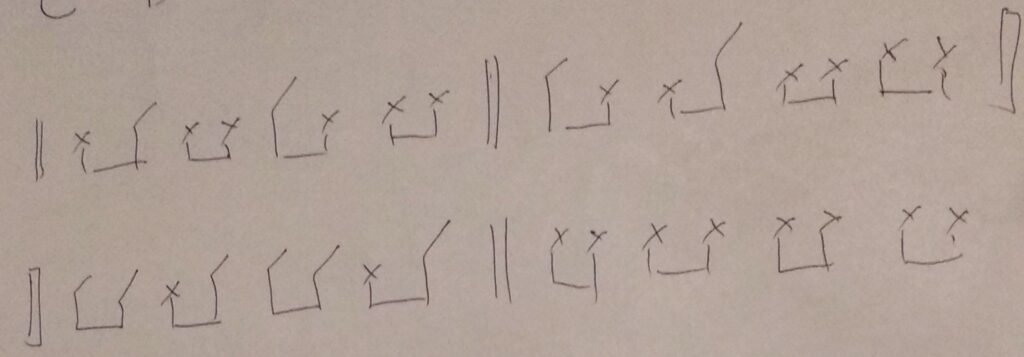
So far I had been doing a very simple strumming pattern that mostly consisted of muting the strings with my left hand and then striking a downbeat from top to bottom across all strings. The below pattern is a new one that consists of both an downbeat and an upbeat. The first part of the downbeat consists of strumming all six strings from the top string 6 to the bottom string 1. This is followed by strumming the bottom four strings from the bottom up to create a upbeat and then again from string 4 (top) down to string 1 (bottom) for a downbeat. This is finalized by an upbeat again from the bottom string 1 up to the fourth string from the bottom string 4.

Lets have a listen to the first of these patterns as shown in the picture above. This first pattern is a single repetition (1 & 2 &) followed by a rest at (3 & 4 & | 1 & 2 & | 3 & 4 &). I’ve included a second audio with this one to show how this can be used in combination with the later rhythm shown in the last section.
Now looking at the second pattern which consists of the pattern repeated twice for 1 & 2 & | 3 & 4 &.
Now lets look at the third scenario which consists of the pattern repeated 4 times. For the following beats: 1 & 2 & | 3 & 4 & | 1 & 2 & | 3 & 4 &. For simplicity during the strumming instead of counting the and we can count at double speed and replace the above beats as: 1 2 3 4 | 1 2 3 4 | 1 2 3 4 | 1 2 3 4.
Rhythm Patterns
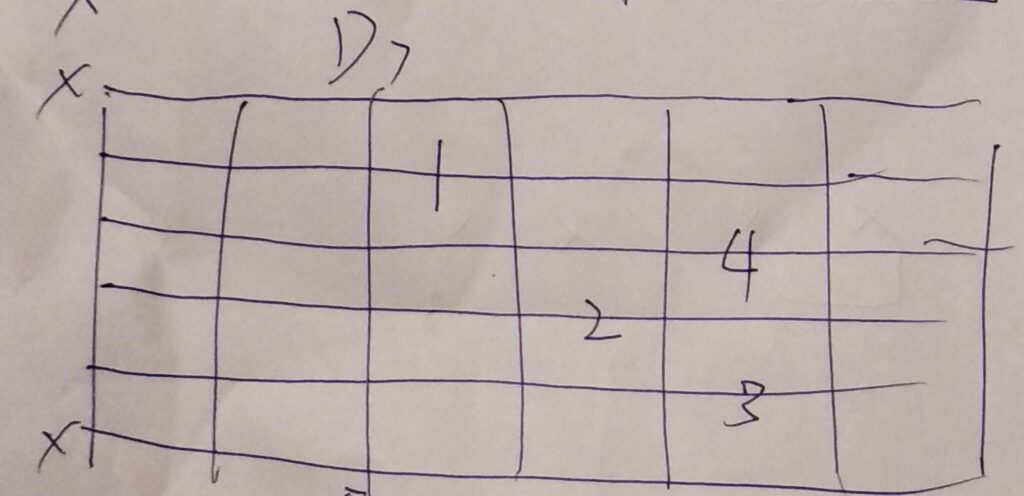
Now we can also continue with our rhythm training. Last time I had looked at pressing and releasing E7 chord and combining it with simple downbeat strumming. I often had problems finding the one note during this rhythm training. So to start off, the below audio is a reference to help learn where the one beat happens. The first audio is slow, the second audio a little faster.
This can be continued further and we can now add some additional patterns as shown below. These are combined with the E7 chord and played as either mute or compressed.
Lets have a listen to the audio of the first patter shown above. Here the counting is pretty important and I found that I had to use the full counting from 1 & 2 & 3 & 4 for the first bar and then repeated for the second bar.
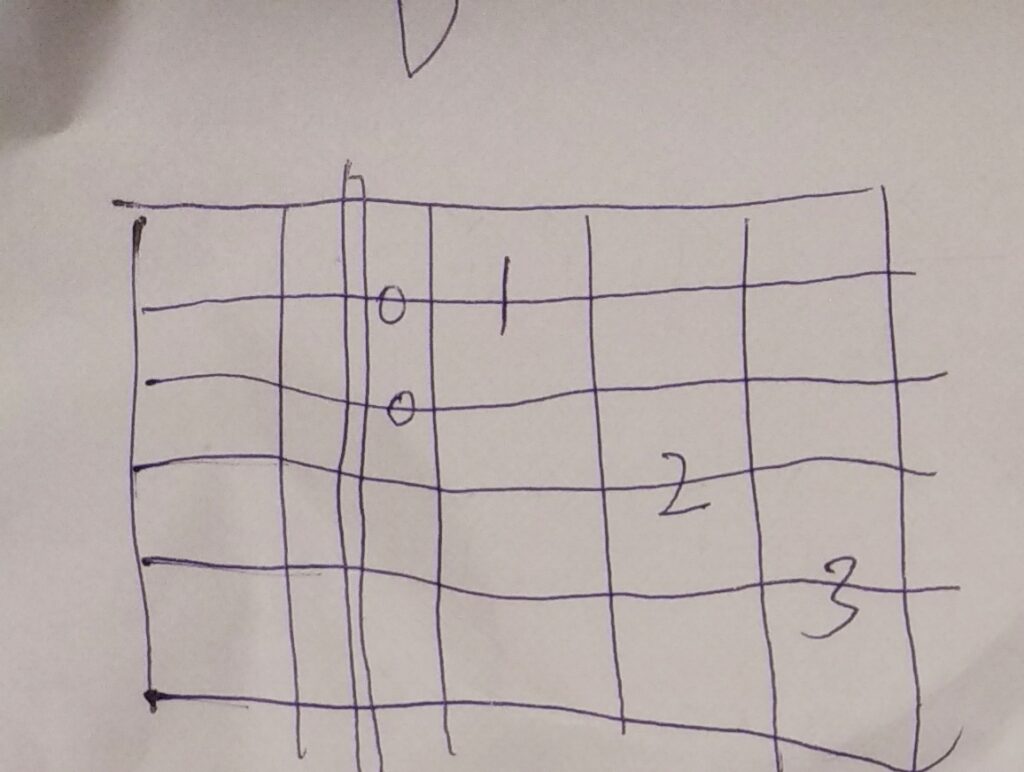
With the second rhythm shown in the diagram we get the following audio. Actually I started off with a more complex rhythm, but I wasn’t able to get the second half so Lao Liu, my teacher, changed the second bar to a rest bar to make it easier to become familiar with the changing rhythm.
From this we can move onto the next rhythms. There are three sets of rhythms shown below. I’ve inserted the audio for each separately.
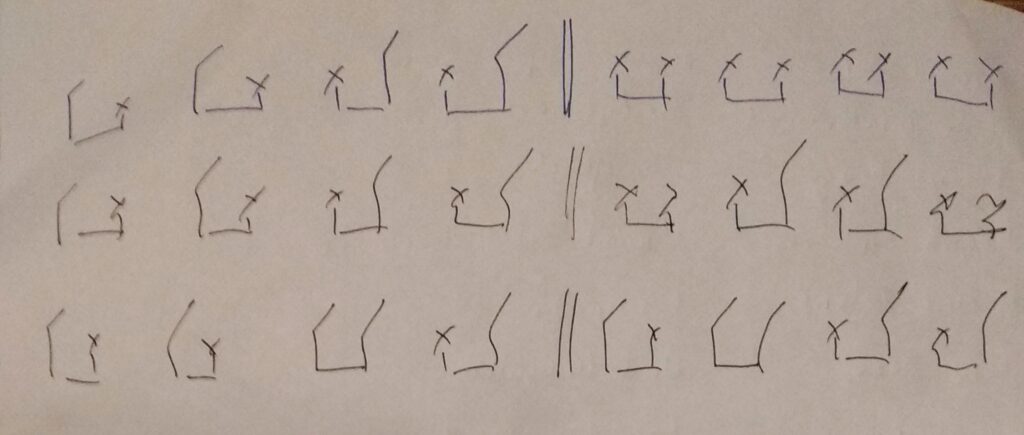
The audio for the first rhythm is shown below. Have a listen. With all of these it was a matter of muscle memory and getting used to the pattern. At the moment I find I have to start off the rhythm by counting each note explicitly. But there were times where Lao Liu suggested that I try to feel the music and also not look at the individual notes. The way I had to work on this was to use my body to anchor the rests or chord compression such that they made sense. But, whenever I looked away from the piece of paper or stopped counting I found myself loosing track of where I was and getting confused.. This is something I need to keep working on.
Here is the second rhythm. Have a listen. This is just the expanded version of the previous rhythm. It includes the second bar as opposed to a rest.
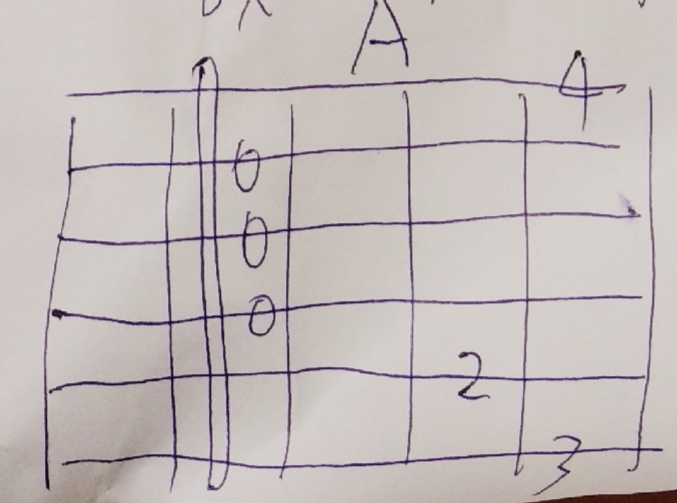
This last rhythm includes a note to mark the one note. I was having a lot of trouble working out where the first note was in the bar so Lao Liu added it into the recording for me to synchronize to.
Here’s another faster version of the above with some down and upbeat strumming added to the mix shown earlier in this article.
For all of these rhythms we can speed up considerably. This is the next goal. To be able to play not at 70 beats per minute but at higher speeds of 90 beats as shown below or faster up to 120 beats per minute.
Now just for good measure here are a few more versions of the final rhythm shown in the picture.