The previous weeks I had begun the process of learning the basics of strumming and chords. This week, follow me on the next two weeks of my journey to not sucking at music. Crack open a cool can of your favourite drink, a pop corn and watch me fail. .. Damn those internet skeptics. Always ready to mock a poor innocent engineer venturing out into the cruel cruel world. Sighhhhhh. P.S. Learn about my first two weeks here: Learning Guitar Week 1 & 2: The Before Time and the Battle for Strumming and Rhythm.
Week 3: New Chords and Up and Downbeat Strumming
I never really understood what a down beat and an upbeat really were. For some reason the wild gesticulations of my cousin did not do justice to the simplicity of both. So here goes. Time to demystify. But first. Lets talk about some new chords.
New Chords and Switching from C7 to D7 and E7
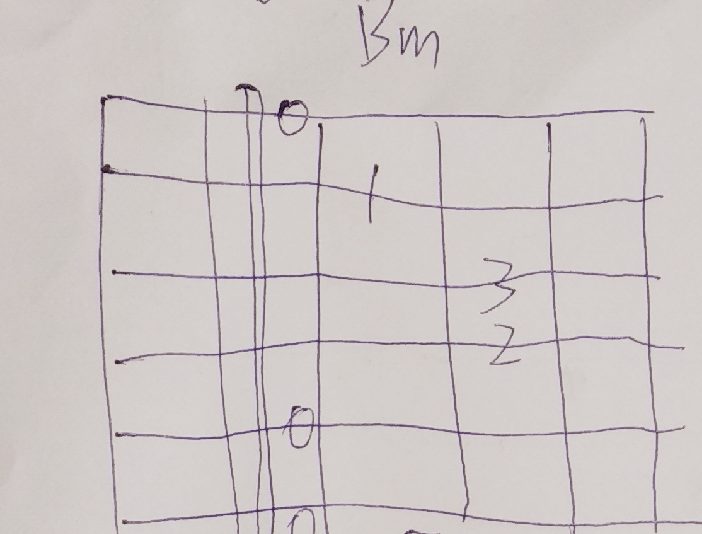
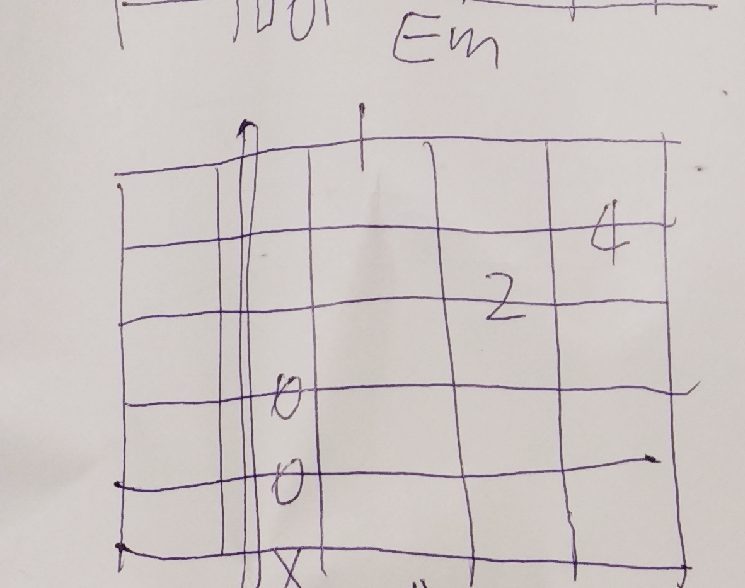
As the next stage in my previous article (Learning Guitar Week 1 & 2: The Before Time and the Battle for Strumming and Rhythm) I worked out how to do strumming with muted strings. Now its time to learn how to press chords at the right time while strumming. And this is where our C7, D7 and E7 chord transitions are going to come in. Below is the chord and fingering chart for these. X marks muted strings and the top string is the bottom most string in your guitar. The numbers represent the finger to use for pressing the chord (with one being the index finger and counting up to four for the pinky finger).
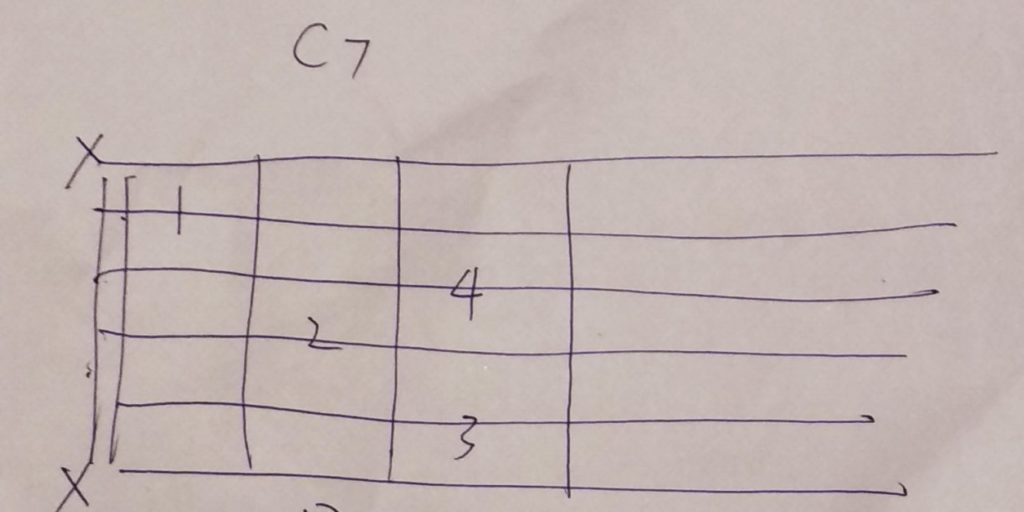
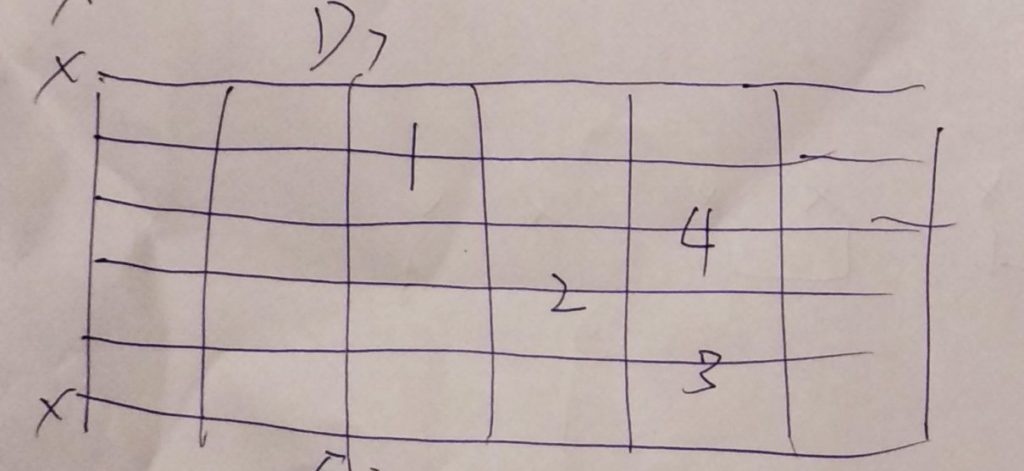
In order to move from C7, we can shift our chord hand down the neck by two frets to hit the D7 chord. Likewise we can find the E7 chord by shifting an additional two frets. Below is the E7 chord I’ll be using for the remainder of this article.
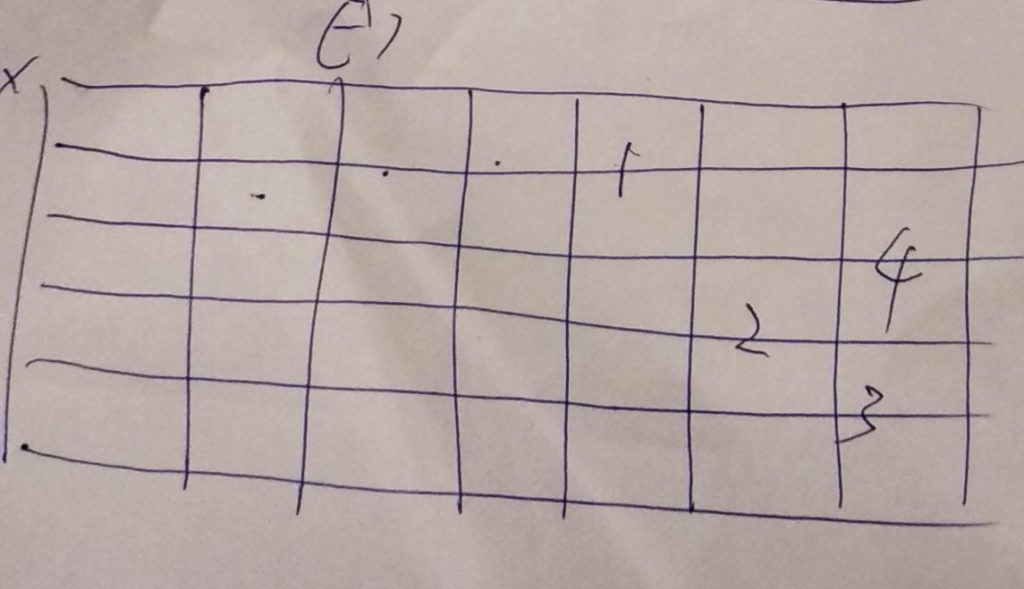
The video below shows the transition between C, D and E – I forgot to put finger 4 on the 3rd string from the bottom… doh. But you get the idea. Its simply a matter of keeping your finger positions identical as you move them along the fretboard
On the Note
The below rhythm is played Using a metronome at around 70 beats per second with the E7 chord. Here the for the first four notes the chord should be pressed on the 1, 2, 3, 4 beats and released and lightly held to mute on the & between each note.

Its important here to mute both the top string with your thumb and the bottom most string with your index finger to proven ringing while you are strumming. See below.
Playing this series of notes should result in the following beats. Have a listen. We can play along with this tune made by Lao Liu, my music teacher here in Taiwan. Below is an example of how to play these notes. That’s me playing.
On the AND
Instead of pressing down on the chord during the one, two, three and four notes, we do the pressing of the chord on the & notes. This should sound exactly the same as the on the note rhythm just that the chord is played slightly delayed.

Here’s a video of me playing this on the AND rhythm. Again when muting we still strum so that we get the very soft muted sound on the strum on the one, two, three, four notes.
Week 4: Even More Chords and More Strumming Combos
During week 4, I essentially continued this process to learn to play additional rhythm patterns. These rhythm patters are slightly more complex but follow the same method as earlier and again we make use of the E7 chord.
Double Rhythm
In this rhythm the chord is pressed down on one &, three & beats and muted on the remaining beats. It helps to count out each note along with the & to get a sense of when to coordinate your finger presses onto the fret board and the strumming.

Once more, below is a video of me playing this rhythm. In practice, you can follow along with the audio. The audio changes tempo slightly and can be used as a guide to check whether you are playing the strumming pattern at the right rhythm.
Off Beat Rhythm
Here there is a slight adjustment. I play on the one and the two’s & note only. But once again rinse and repeat.

The video below demonstrates. Again counting really does help. But at some point we want to move away from counting and playing by ear. Once you are done counting and looking at the notes. Hide the notes and try to play to the rhythm you hear. This is the transition to learning how to improvise as well.
Another Off-Beat Rhythm
You can probably tell that my titling has degenerated into random names for these patterns. The last pattern is what it is. Try it.

Again you can watch a video of me playing this pattern below as well. Hopefully by now its pretty self explanatory.
Homework
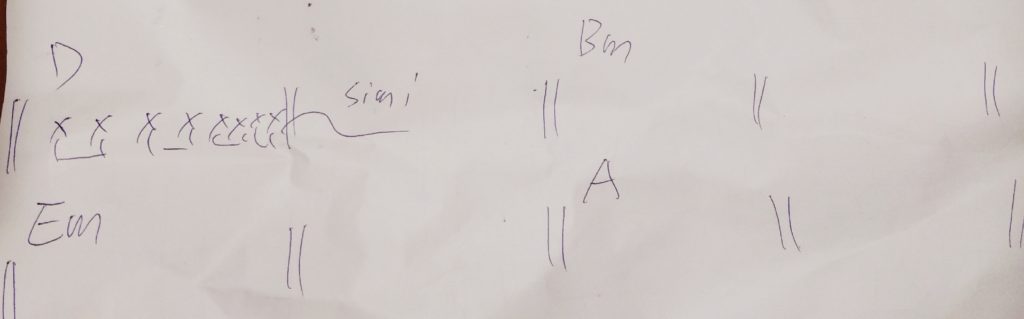
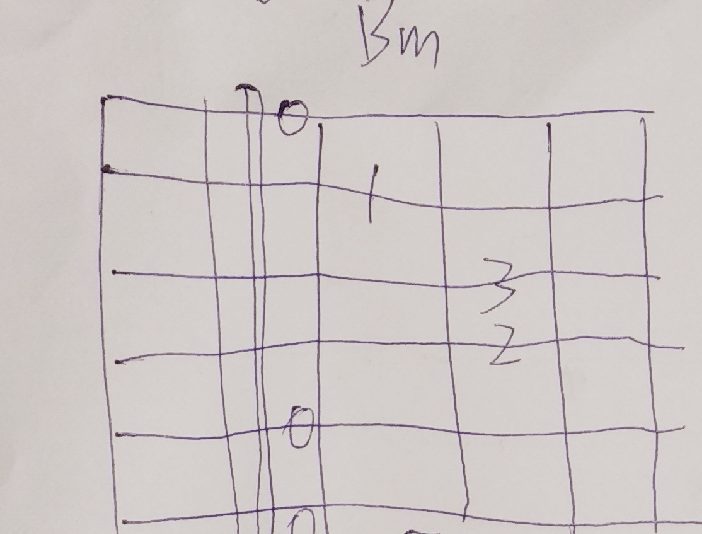
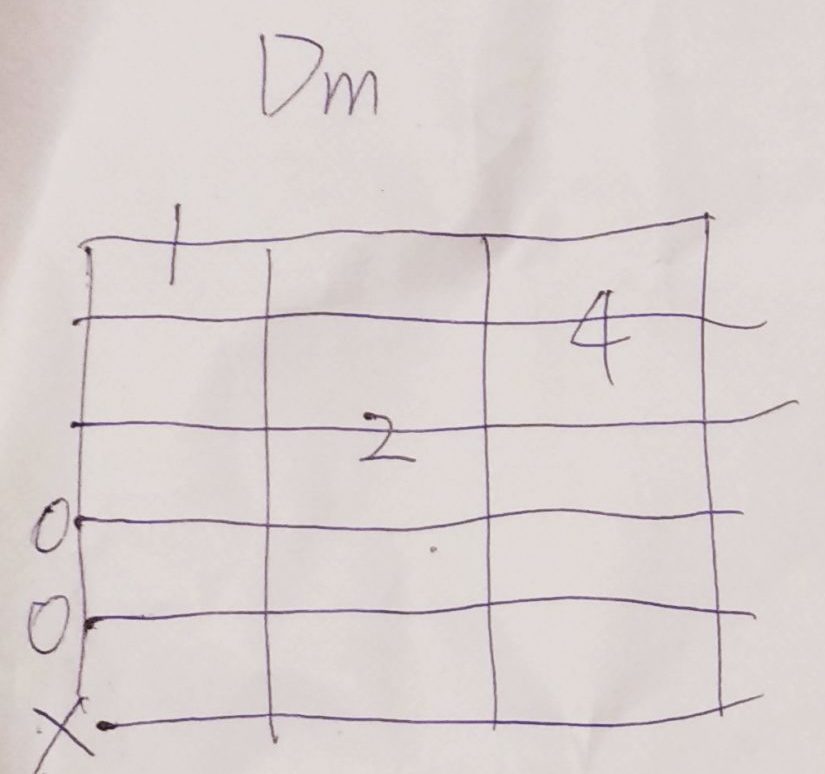
At the end of every class Lao Liu likes to inspire me to learn a few new things and to practice them daily. And that’s what I do. At least when I’m not getting lazy. Notice that the G and the A are identical except that there is a capo present and attached in A to change the second fret into the fret bridge. Likewise with the second column A-minor note and the B-minor note. And with the third column D-minor and E-minor notes.
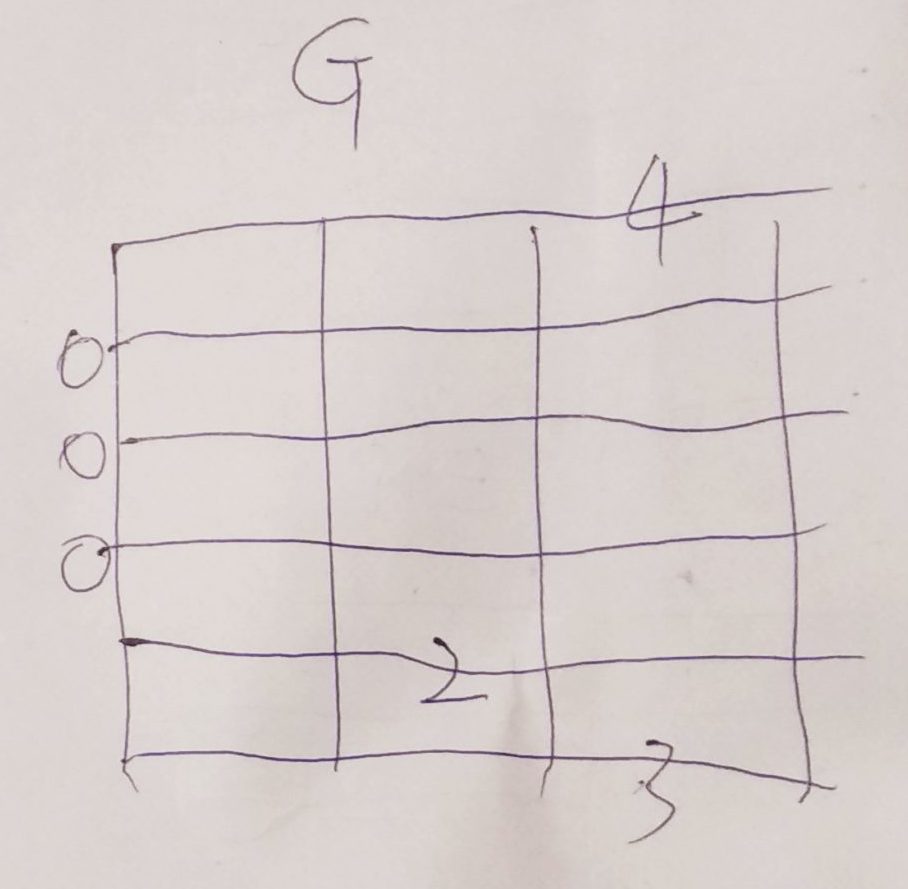
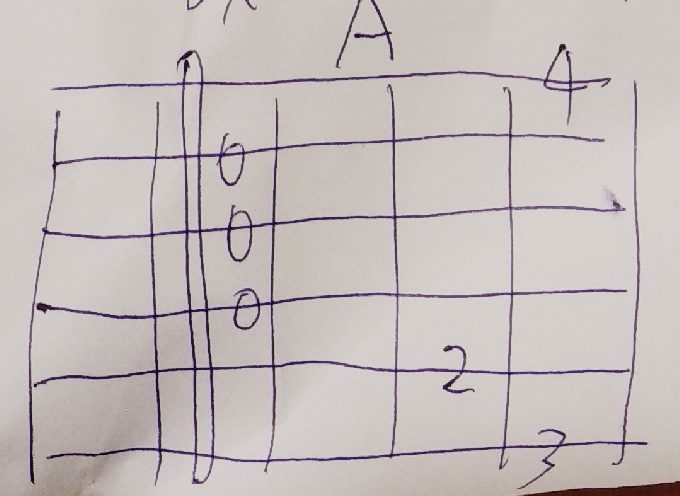
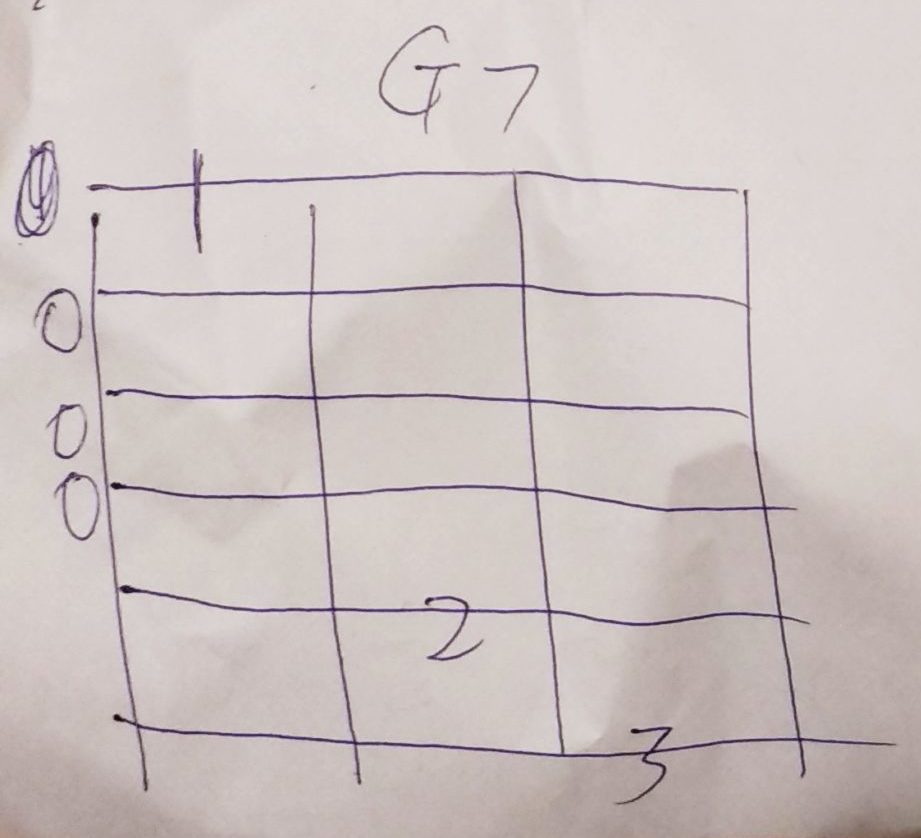
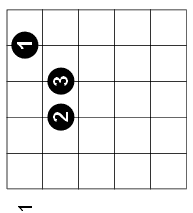
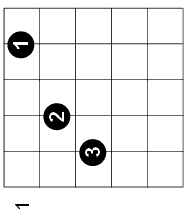
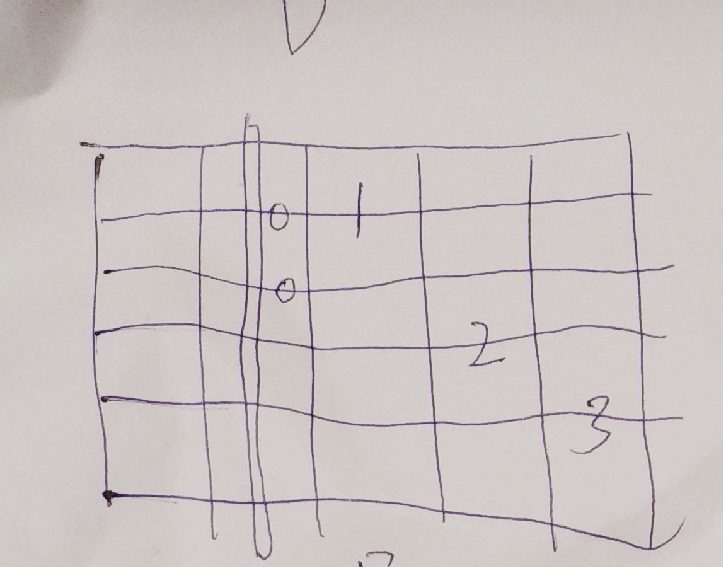
In the last row we see that C and D show similarities and it is a relatively easy transition from G7 to C and from A to G7. By using these rules you can remember the transitions more easily. Oh. Also remember that the round circles represent open strings.
From these new notes now its possible to start to play some music. The below score is for Last Christmas by George Michael. Maybe you will be more successful than me. Facepalm x2.